
In this Audacity tutorial, we will add a Delay effect to a vocal sample. Delay is a time-based audio effect that captures an input signal and repeats it after a set period, creating clear, repeated echoes. [1] This repetition can occur once, multiple times, or even feed back into itself to create a series of echoes, adding depth, rhythm, and spatial dimension to sounds in music and live performances.
In this tutorial:
Required knowledge:
Delay-ay-ay-ay…
and open in Audacity.
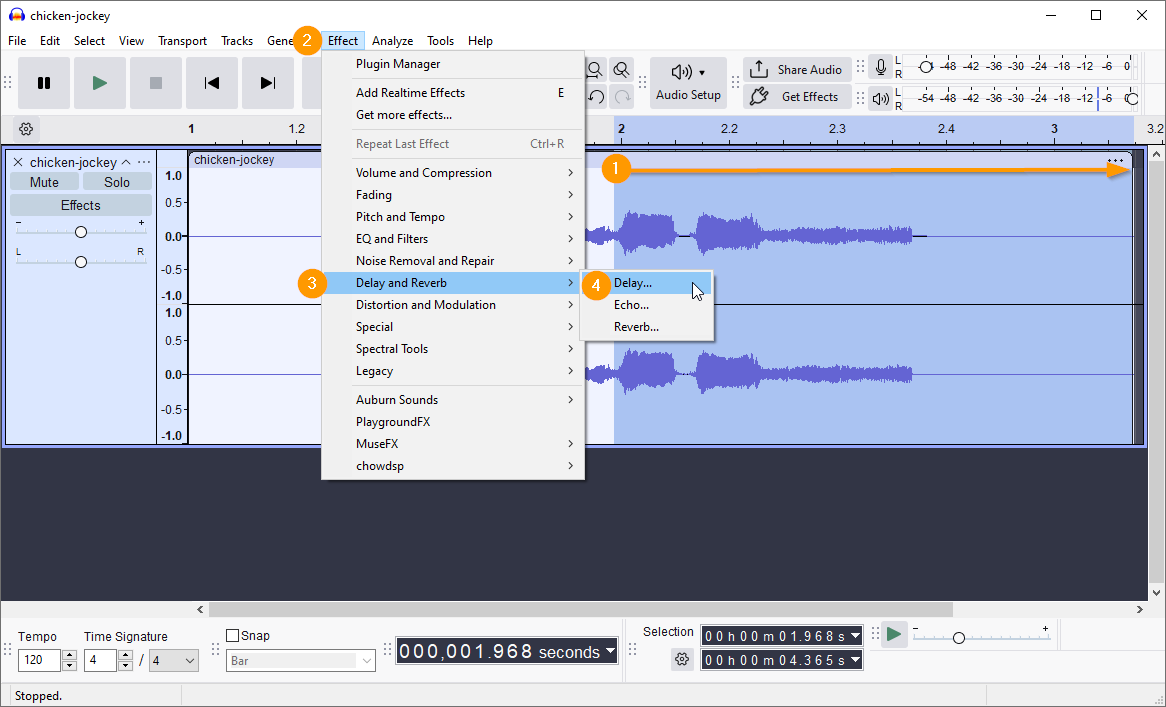
- Select the end of the short sample: from the beginning of the word “jockey” to the end of the sample
- In the menus, navigate as follows: Effect
- Delay and Reverb
- Delay…
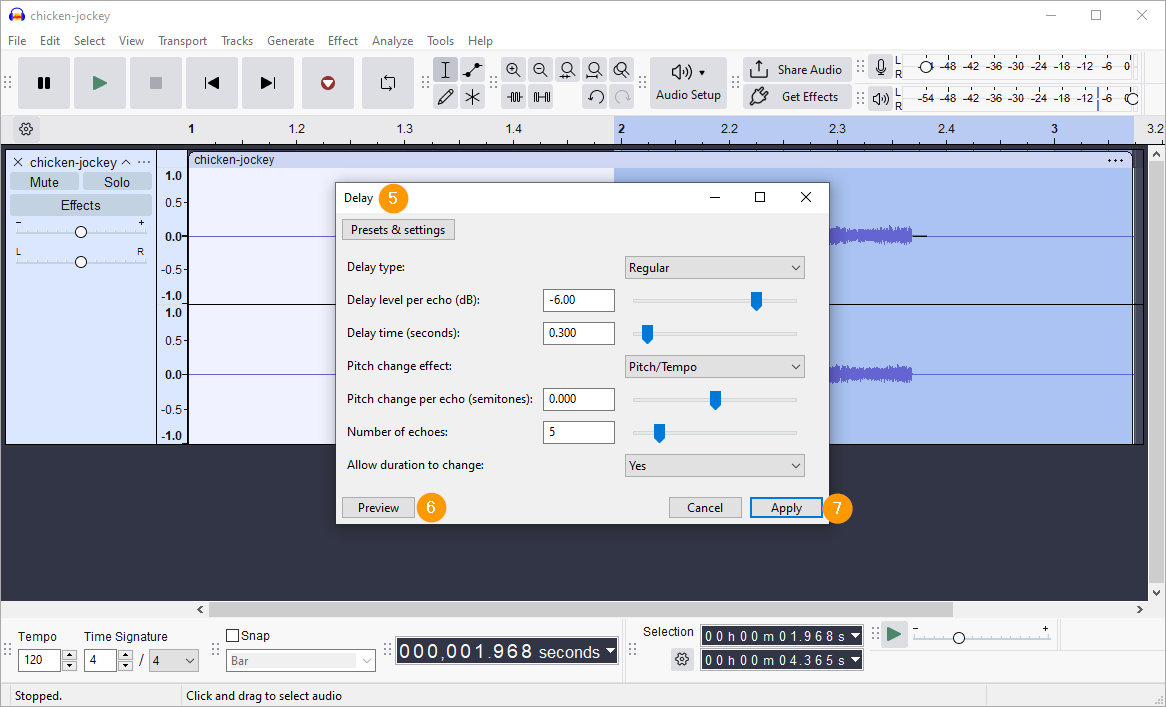
- The Delay dialog opens; for now, use the default settings
- Listen to the effect by clicking the Preview button
- Click the Apply button
Join the clips on the track together: Edit » Audio clips » Join
Add silence
If you make a selection that does not end at the end of the track, you will see the following: “There is not enough room available to paste the selection.”
Click OK to dismiss the error message.
The delay needs space on the track to echo into, so you must add a few seconds of silence at the end of it. Be generous, we will delete any unneeded silence later
Generate>> Silence…
Delete
To remove unwanted silence from the start and end of the track, manually select and delete, or use the “Truncate Silence” effect by selecting the entire track, going to the Effects menu, selecting the Special option, and choosing Truncate Silence, then adjusting the settings and clicking Apply.
Result
I cleaned up (deleted the beginning of the track and exported the sample as an MP3:
References:
- Johncy, J. pointblank Music School (2025). How to Use Different Types of Delay Effects in Music Production. Available at: https://www.pointblankmusicschool.com/blog/how-to-use-different-types-of-delay-effects-in-music-production (Accessed: 12 September 2025).